SKU: OT480-B33 Varenummer: KAA193 EAN: 4918520297533

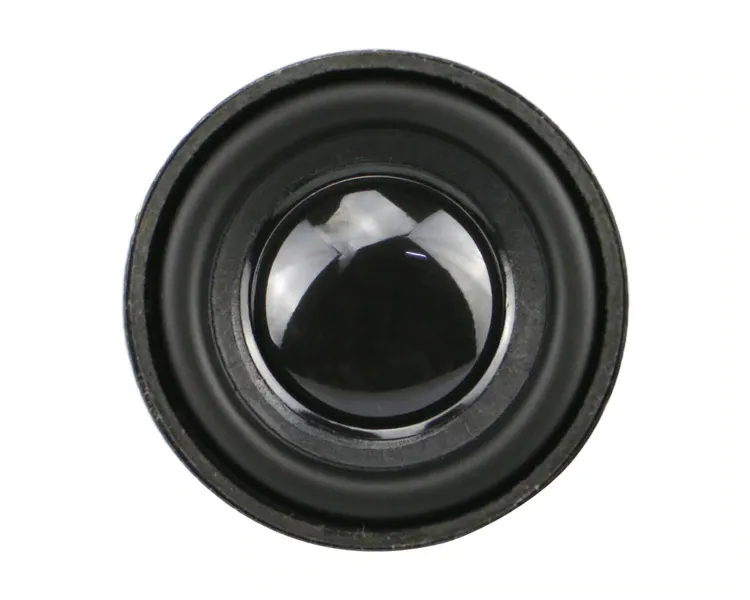
Lille højttaler med en diameter på 40mm.
Effekt: 3 Watt
Impedans: 4 Ohm
Højde: 19mm
Farve: Sort
Sådan tilslutter du Højttaler 3W 40mm til en Arduino UNO eller ESP32, med en eksempelsketch, du kan uploade med det samme.
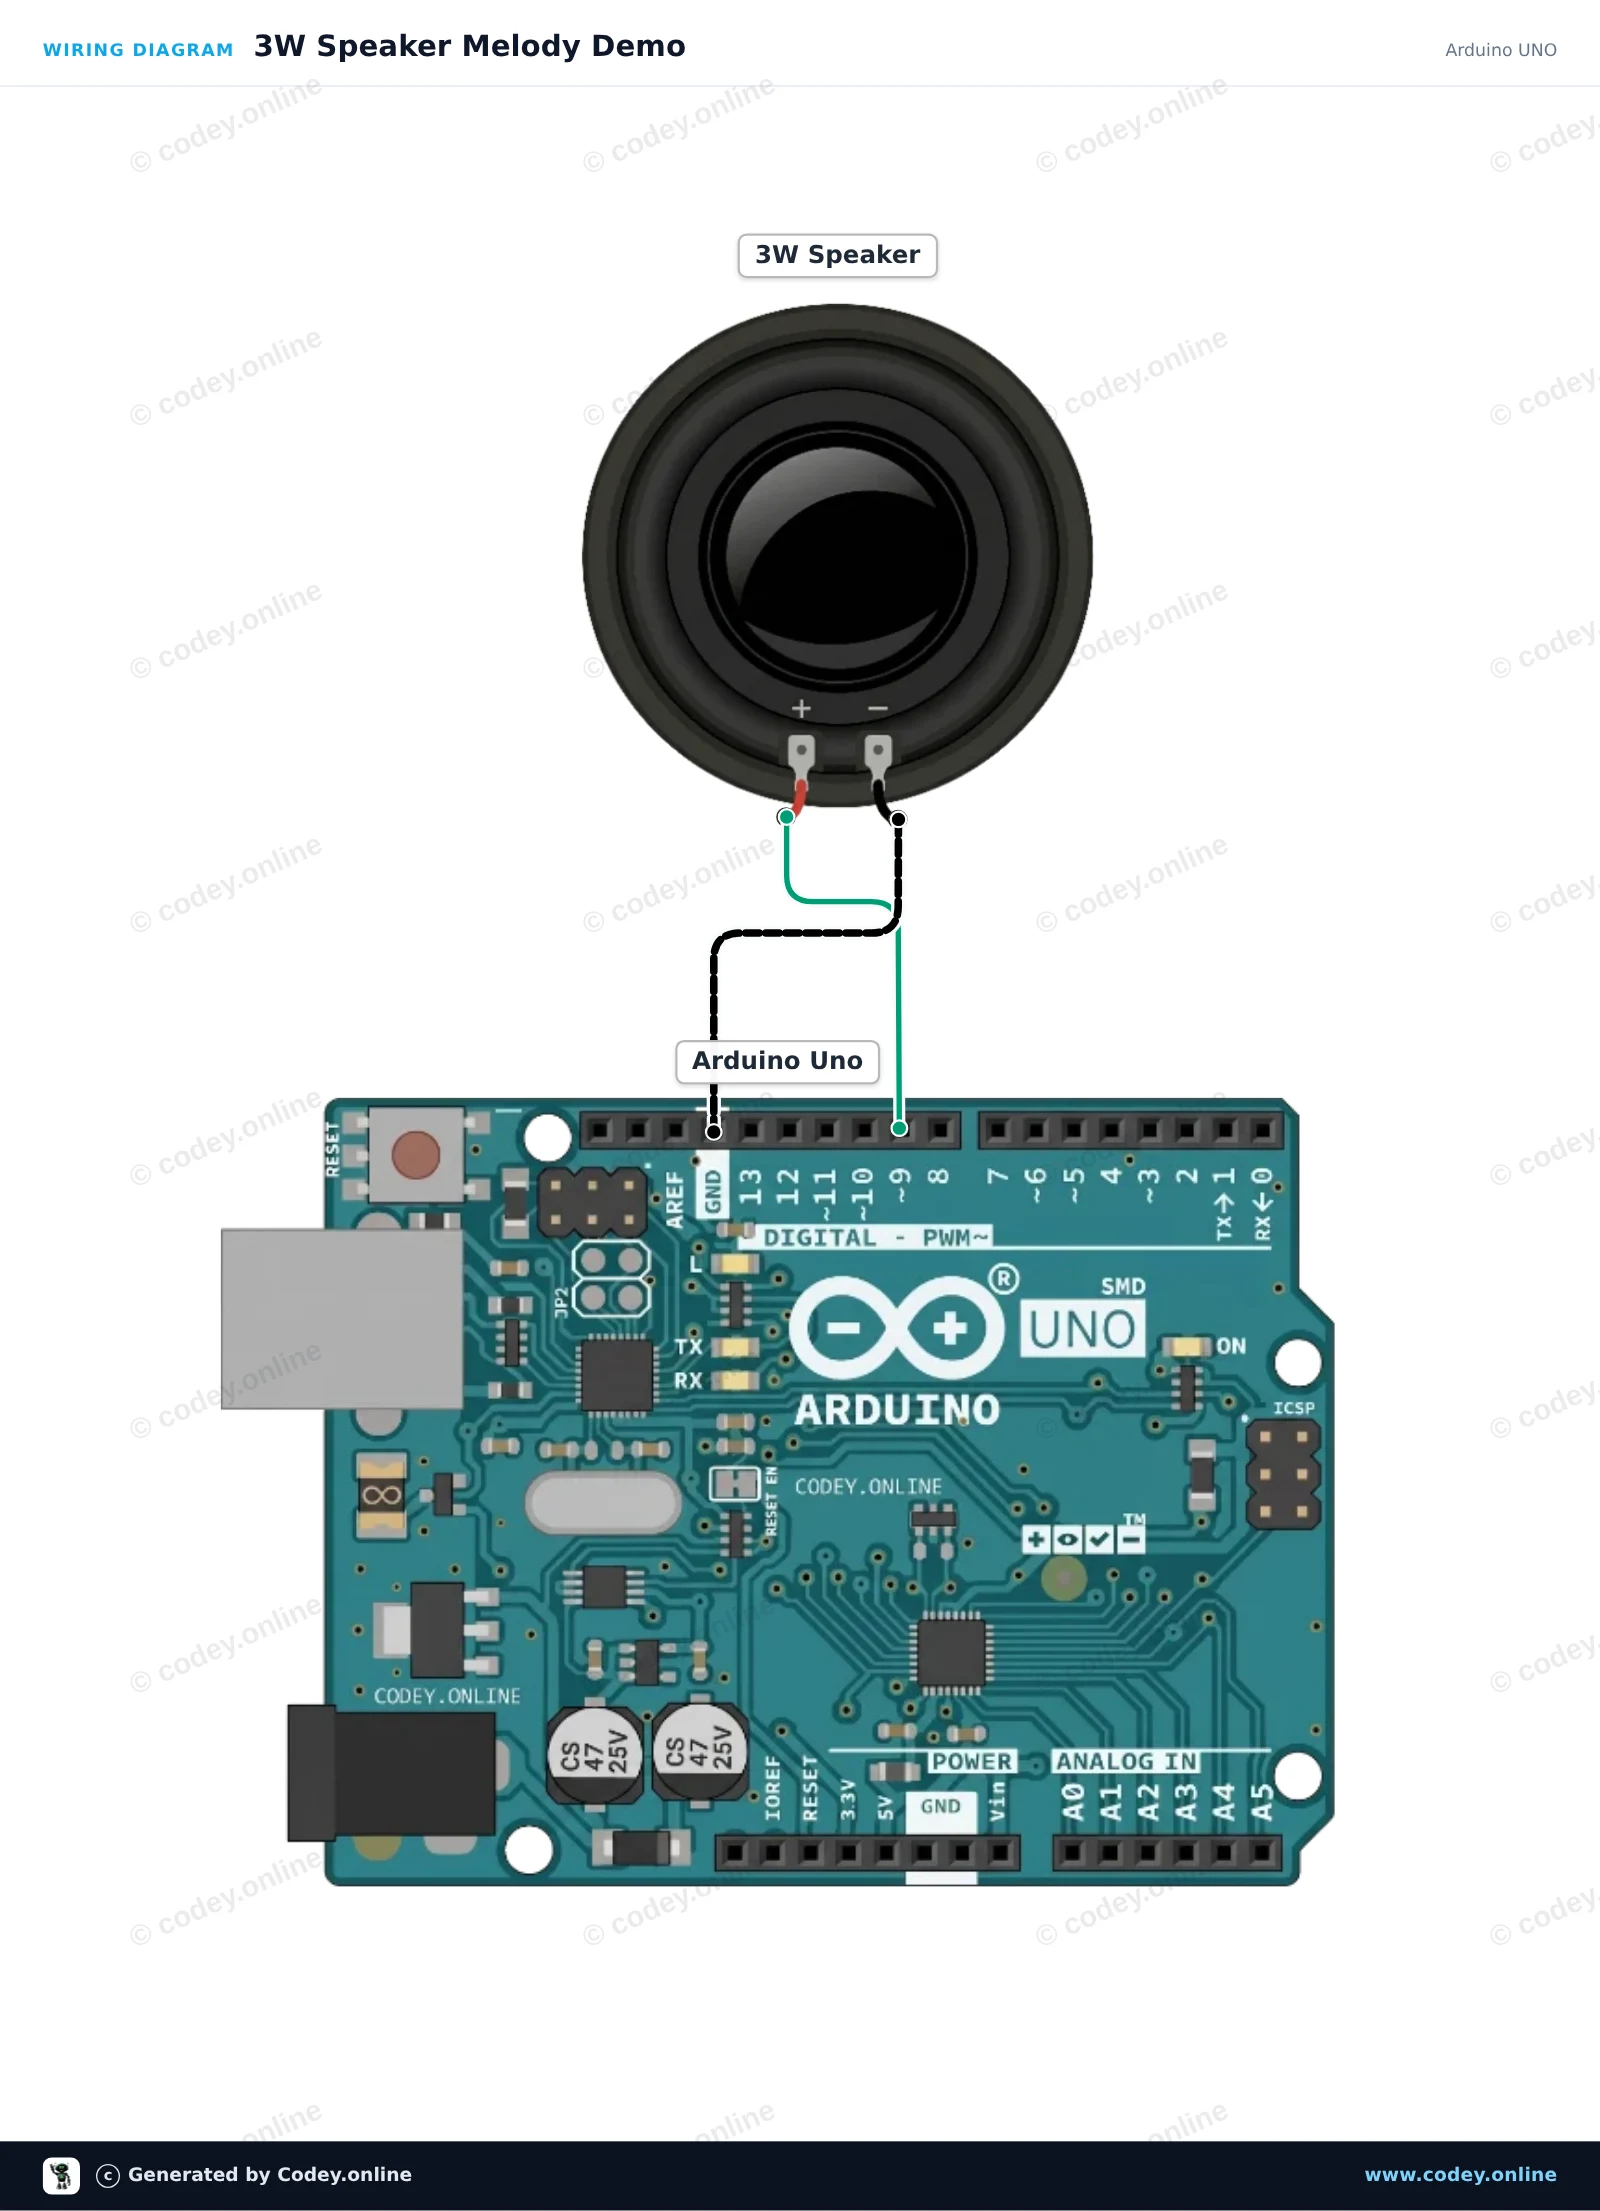
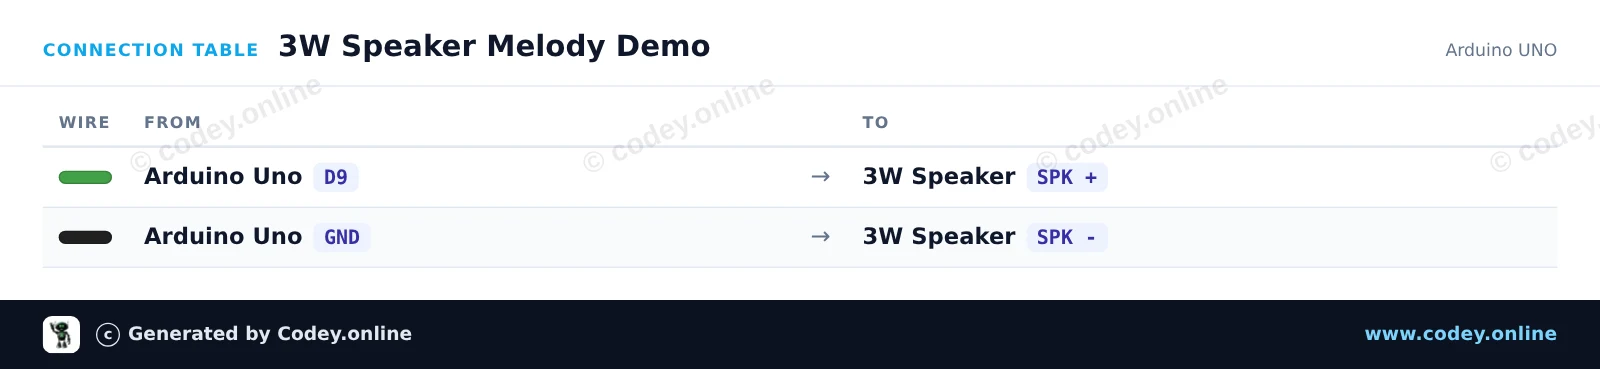
Dette projekt afspiller en musikalsk skala med 8 toner på en 3W-højttaler ved hjælp af Arduinos indbyggede tone()-funktion. Den positive terminal forbindes til digital pin 9 og den negative terminal til GND. Bemærk: selv om denne direkte forbindelse virker til simpel tonegenerering, anbefales en audioforstærker for fuld lydstyrke og lydkvalitet.
/*
 * ==================================================================
 *  Generated by Codey.online  —  https://www.codey.online
 * ==================================================================
 *  Project   : 3W Speaker Melody Demo
 *  Board     : Arduino UNO (arduino:avr:uno)
 *  Parts     : Speaker 3W
 *  Libraries : none (built-in)
 *
 *  Codey Online is an AI-powered browser IDE for Arduino and ESP32.
 *  Describe your project and Codey writes the code, draws the wiring
 *  diagram and uploads it to your board, straight from the browser.
 *  This code is free to use, modify and share, without warranty.
 * ==================================================================
 */

const int speakerPin = 9;

// Musical notes (C4 to C5 scale in Hz)
const int notes[] = { 262, 294, 330, 349, 392, 440, 494, 523 };
const int noteCount = sizeof(notes) / sizeof(notes[0]);

void setup() {
  Serial.begin(115200);
  Serial.println(F("3W Speaker Melody Demo"));
}

void loop() {
  for (int i = 0; i < noteCount; i++) {
    tone(speakerPin, notes[i], 200);
    delay(250);
  }

  noTone(speakerPin);
  delay(1000);
}Wiring diagram and example code generated by Codey.online — https://www.codey.online
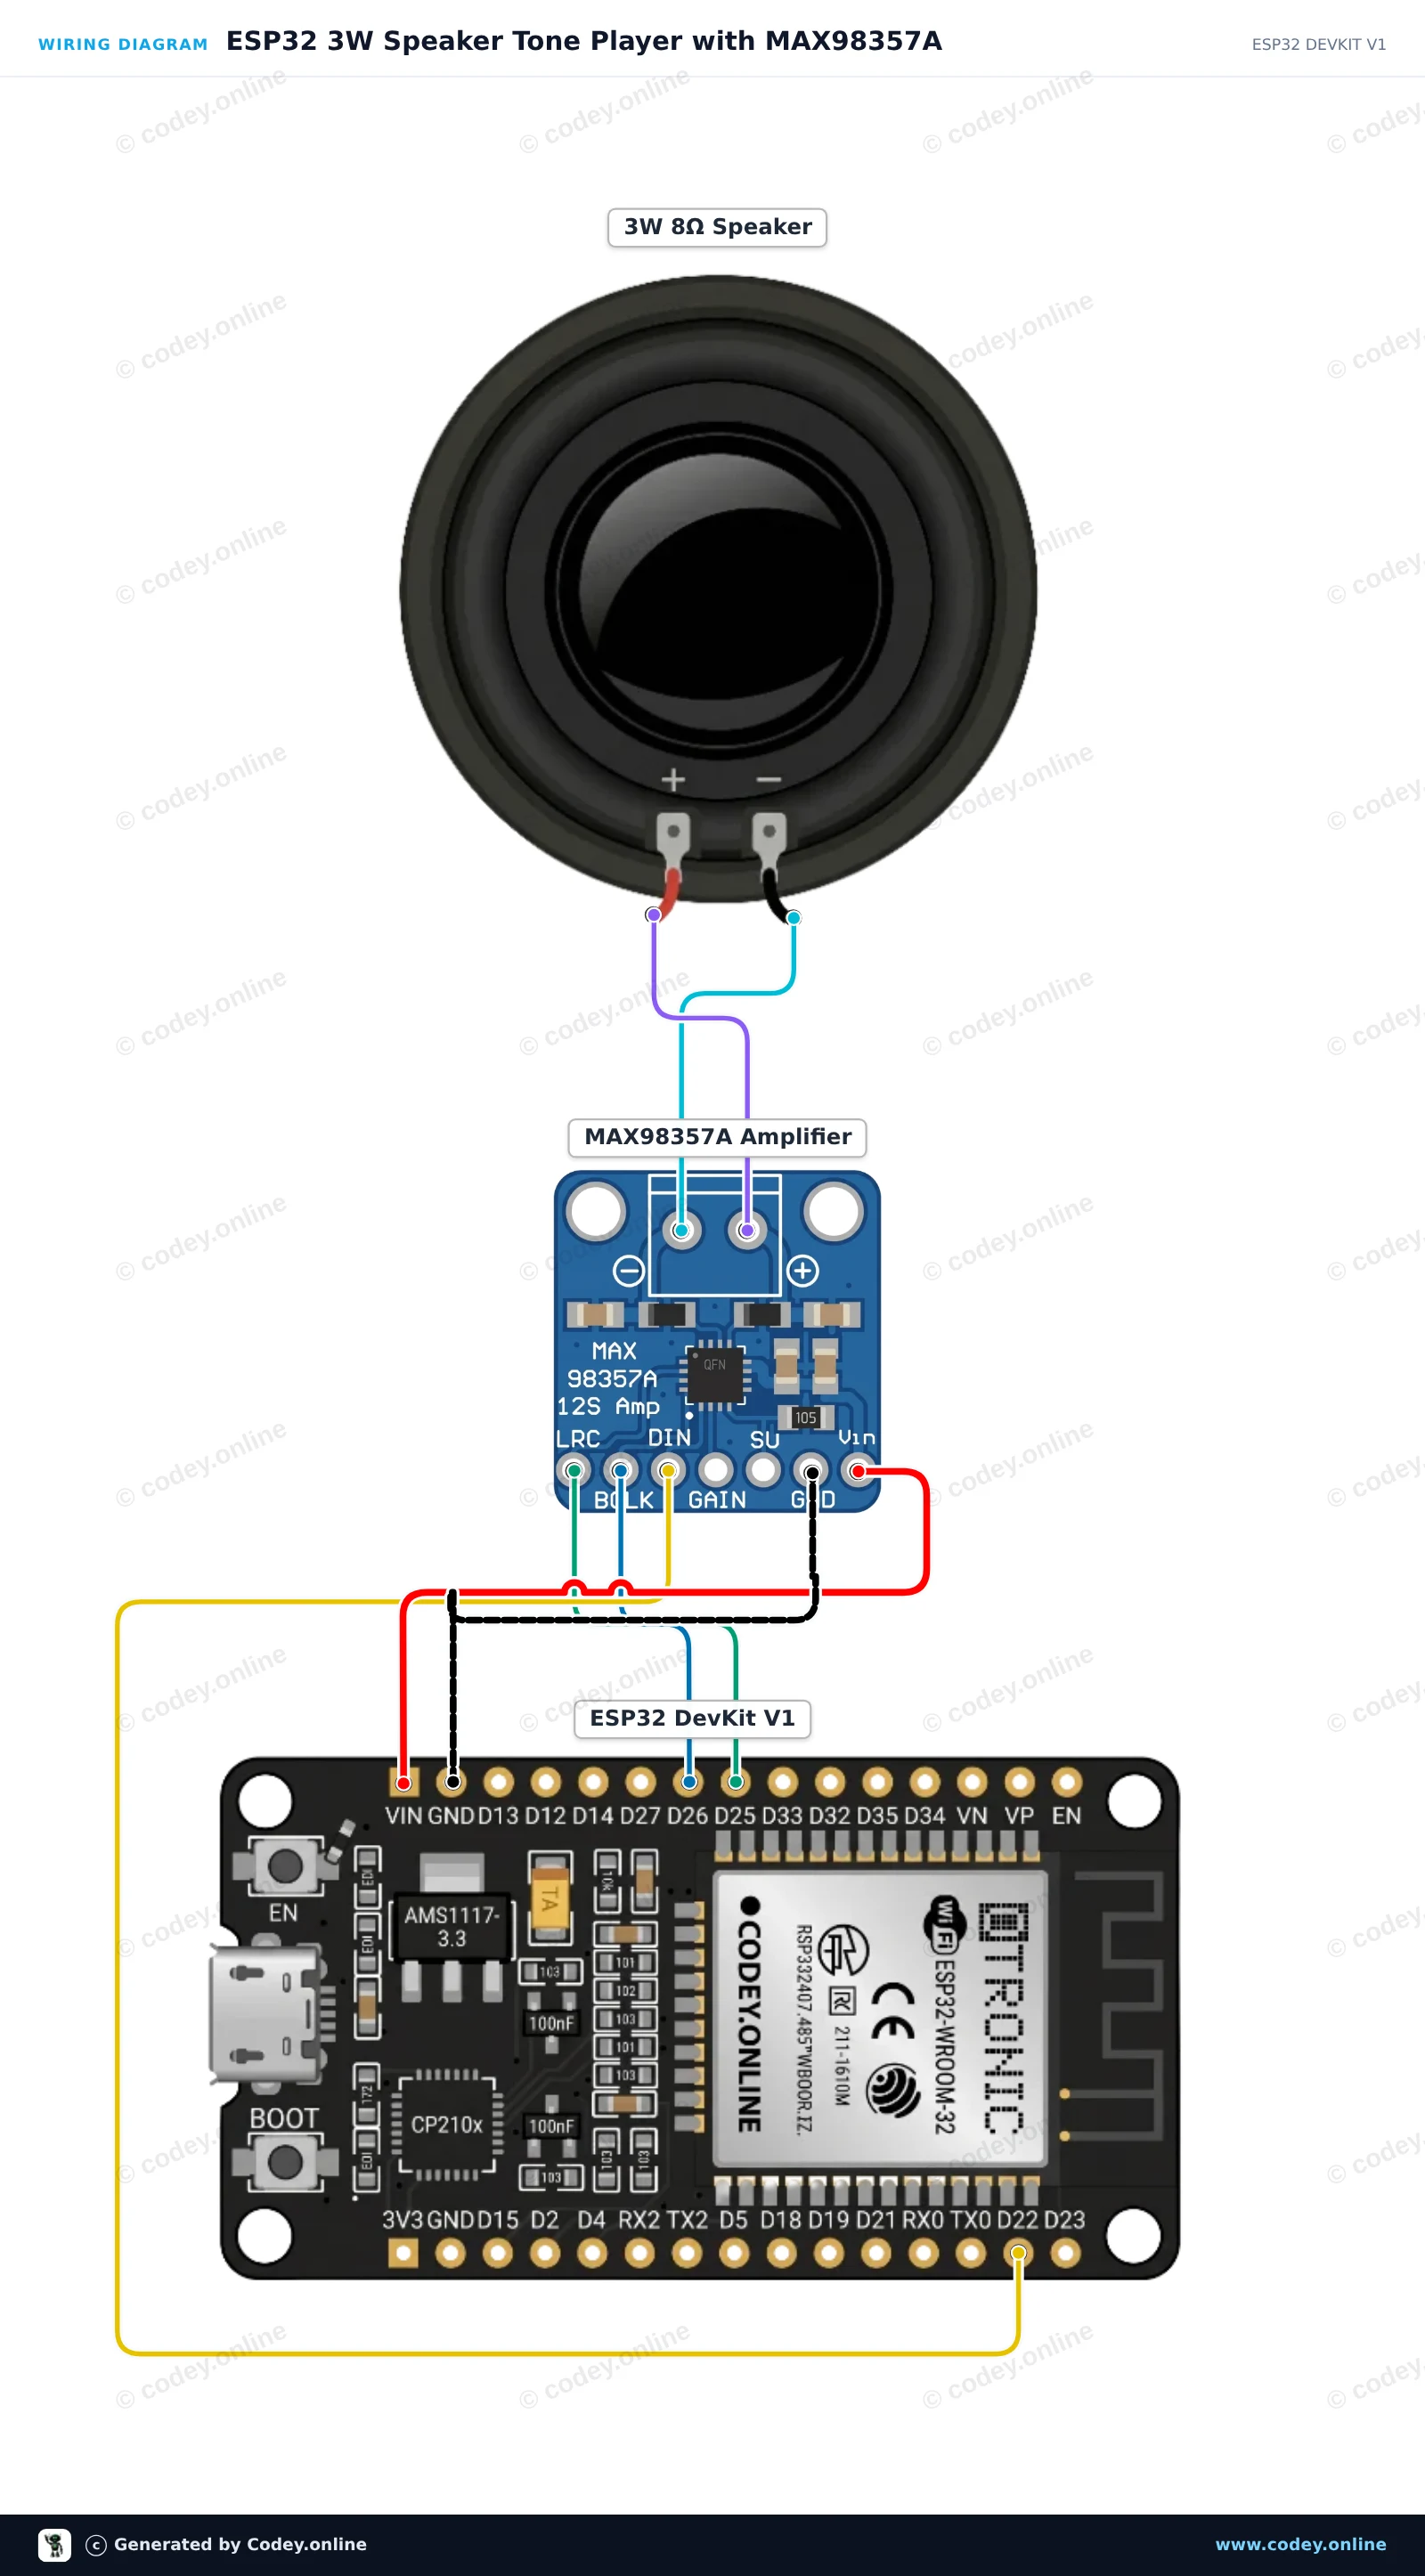
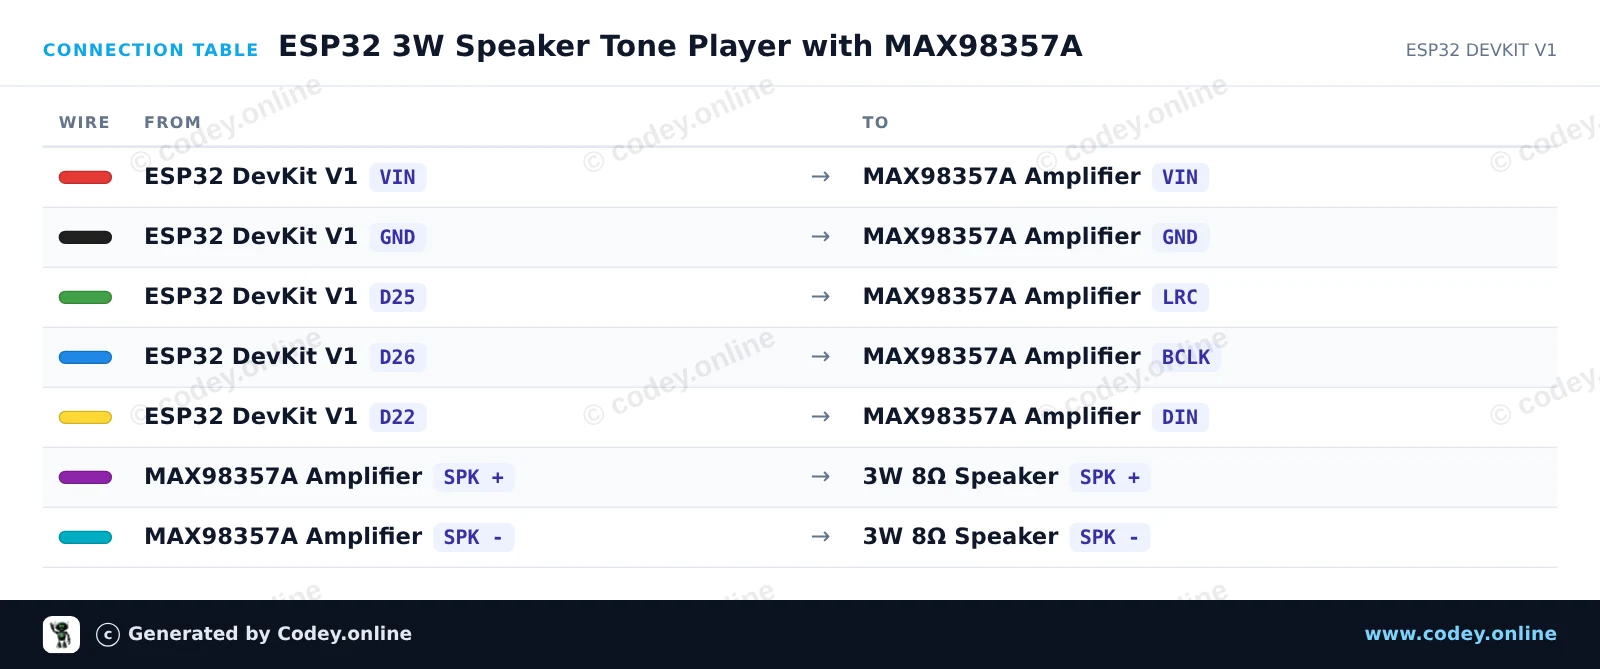
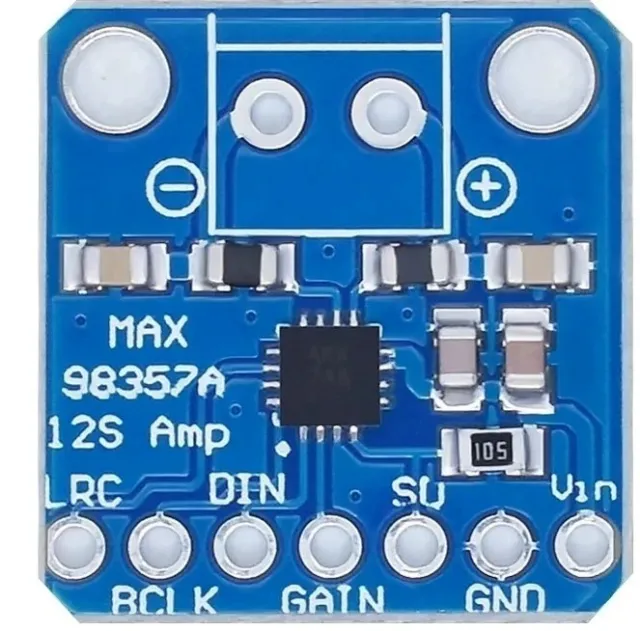
Dette projekt afspiller musikalske toner gennem en 3W-højttaler ved hjælp af ESP32’ens indbyggede I2S-audiointerface og en MAX98357A Class-D-forstærker. ESP32’en syntetiserer lydsamples i software og streamer dem via I2S til forstærkeren, som driver højttaleren direkte.
/*
 * ==================================================================
 *  Generated by Codey.online  —  https://www.codey.online
 * ==================================================================
 *  Project   : ESP32 3W Speaker Tone Player with MAX98357A
 *  Board     : ESP32 DEVKIT V1 (esp32:esp32:esp32doit-devkit-v1)
 *  Parts     : Speaker 3W
 *  Libraries : none (built-in)
 *
 *  Codey Online is an AI-powered browser IDE for Arduino and ESP32.
 *  Describe your project and Codey writes the code, draws the wiring
 *  diagram and uploads it to your board, straight from the browser.
 *  This code is free to use, modify and share, without warranty.
 * ==================================================================
 */

#include <driver/i2s.h>
#include <math.h>

#define I2S_BCLK_PIN   26
#define I2S_LRC_PIN    25
#define I2S_DIN_PIN    22
#define SAMPLE_RATE    44100

// Musical notes (frequencies in Hz)
const float notes[] = { 261.63, 329.63, 392.00, 523.25 }; // C4, E4, G4, C5

void playTone(float freq, int durationMs) {
  int totalSamples = (SAMPLE_RATE * durationMs) / 1000;
  int16_t buffer[128];
  size_t bytesWritten;

  for (int i = 0; i < totalSamples; ) {
    int chunkSize = min(64, totalSamples - i);
    for (int j = 0; j < chunkSize; j++) {
      int16_t sample = (int16_t)(sin(2.0 * M_PI * freq * (i + j) / SAMPLE_RATE) * 8000);
      buffer[j * 2]     = sample; // Left channel
      buffer[j * 2 + 1] = sample; // Right channel
    }
    i2s_write(I2S_NUM_0, buffer, chunkSize * 4, &bytesWritten, portMAX_DELAY);
    i += chunkSize;
  }
}

void setup() {
  Serial.begin(115200);
  Serial.println("I2S Speaker Demo Initializing...");

  i2s_config_t i2s_config = {
    .mode = (i2s_mode_t)(I2S_MODE_MASTER | I2S_MODE_TX),
    .sample_rate = SAMPLE_RATE,
    .bits_per_sample = I2S_BITS_PER_SAMPLE_16BIT,
    .channel_format = I2S_CHANNEL_FMT_RIGHT_LEFT,
    .communication_format = I2S_COMM_FORMAT_STAND_I2S,
    .intr_alloc_flags = ESP_INTR_FLAG_LEVEL1,
    .dma_buf_count = 8,
    .dma_buf_len = 64,
    .use_apll = false
  };

  i2s_pin_config_t pin_config = {
    .bck_io_num = I2S_BCLK_PIN,
    .ws_io_num = I2S_LRC_PIN,
    .data_out_num = I2S_DIN_PIN,
    .data_in_num = I2S_PIN_NO_CHANGE
  };

  i2s_driver_install(I2S_NUM_0, &i2s_config, 0, NULL);
  i2s_set_pin(I2S_NUM_0, &pin_config);

  Serial.println("Setup complete. Playing melody...");
}

void loop() {
  for (int i = 0; i < 4; i++) {
    Serial.print("Playing note frequency: ");
    Serial.println(notes[i]);
    playTone(notes[i], 300);
    delay(50);
  }
  delay(1000);
}Wiring diagram and example code generated by Codey.online — https://www.codey.online





 English
  Nederlands
  Frans
Frans  Deutsch
  Italiano
  Español
  Suomi
Suomi  Polski
  Ελληνικά
  Български
  Čeština
  Hrvatski
  Svenska
  Aileen