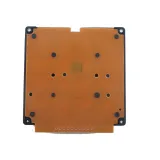
SKU: OT2085-B118 Varenummer: NA171 EAN: 8126478667001

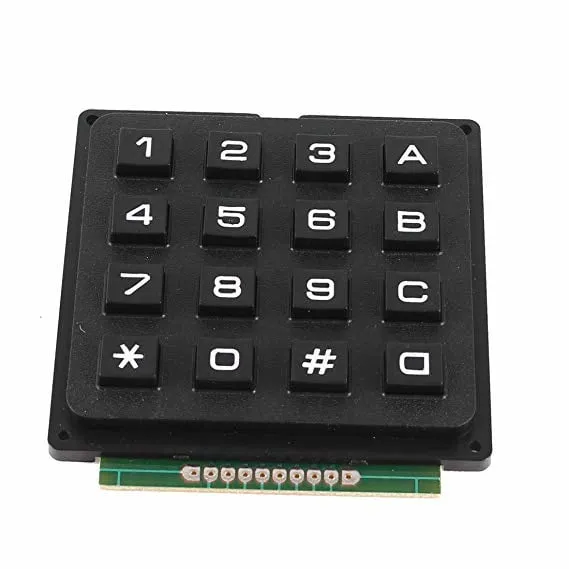
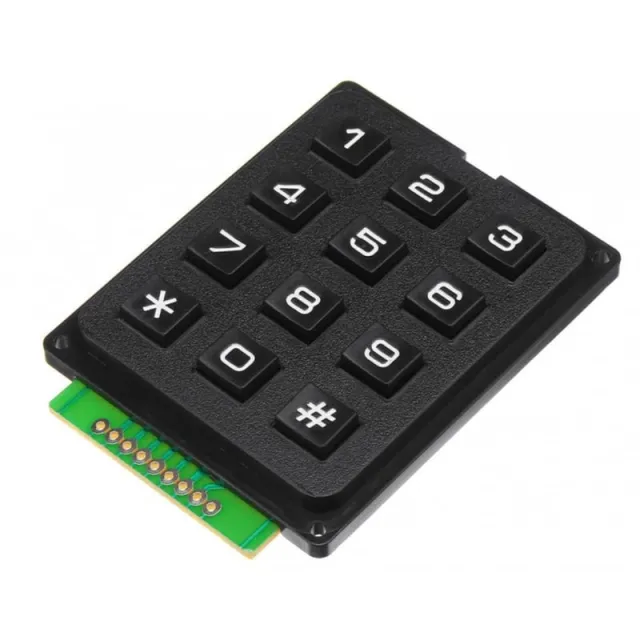
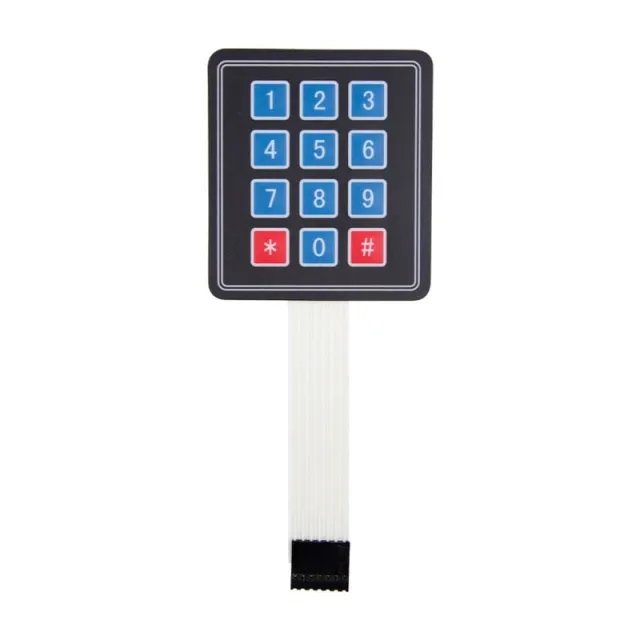
Keypad med plasttaster. Ideel til for eksempel indtastning af en adgangskode.
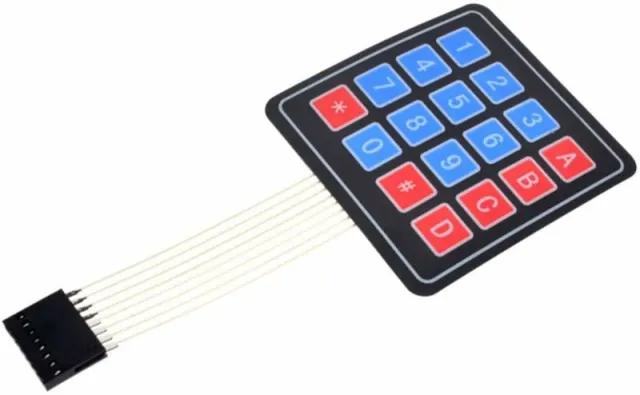
Keypadet har membran-switches, og alle knapper er forsynet med nummerering fra 0-9 samt tegnene * og #. Til højre er der yderligere 4 knapper med A,B,C og D
Modulet er meget velegnet til indbygning. På modulet er der også fire 2mm huller til montering.
Mål
Lengde: 6,9cm
Bredde: 6,5cm
Højde: 1cm
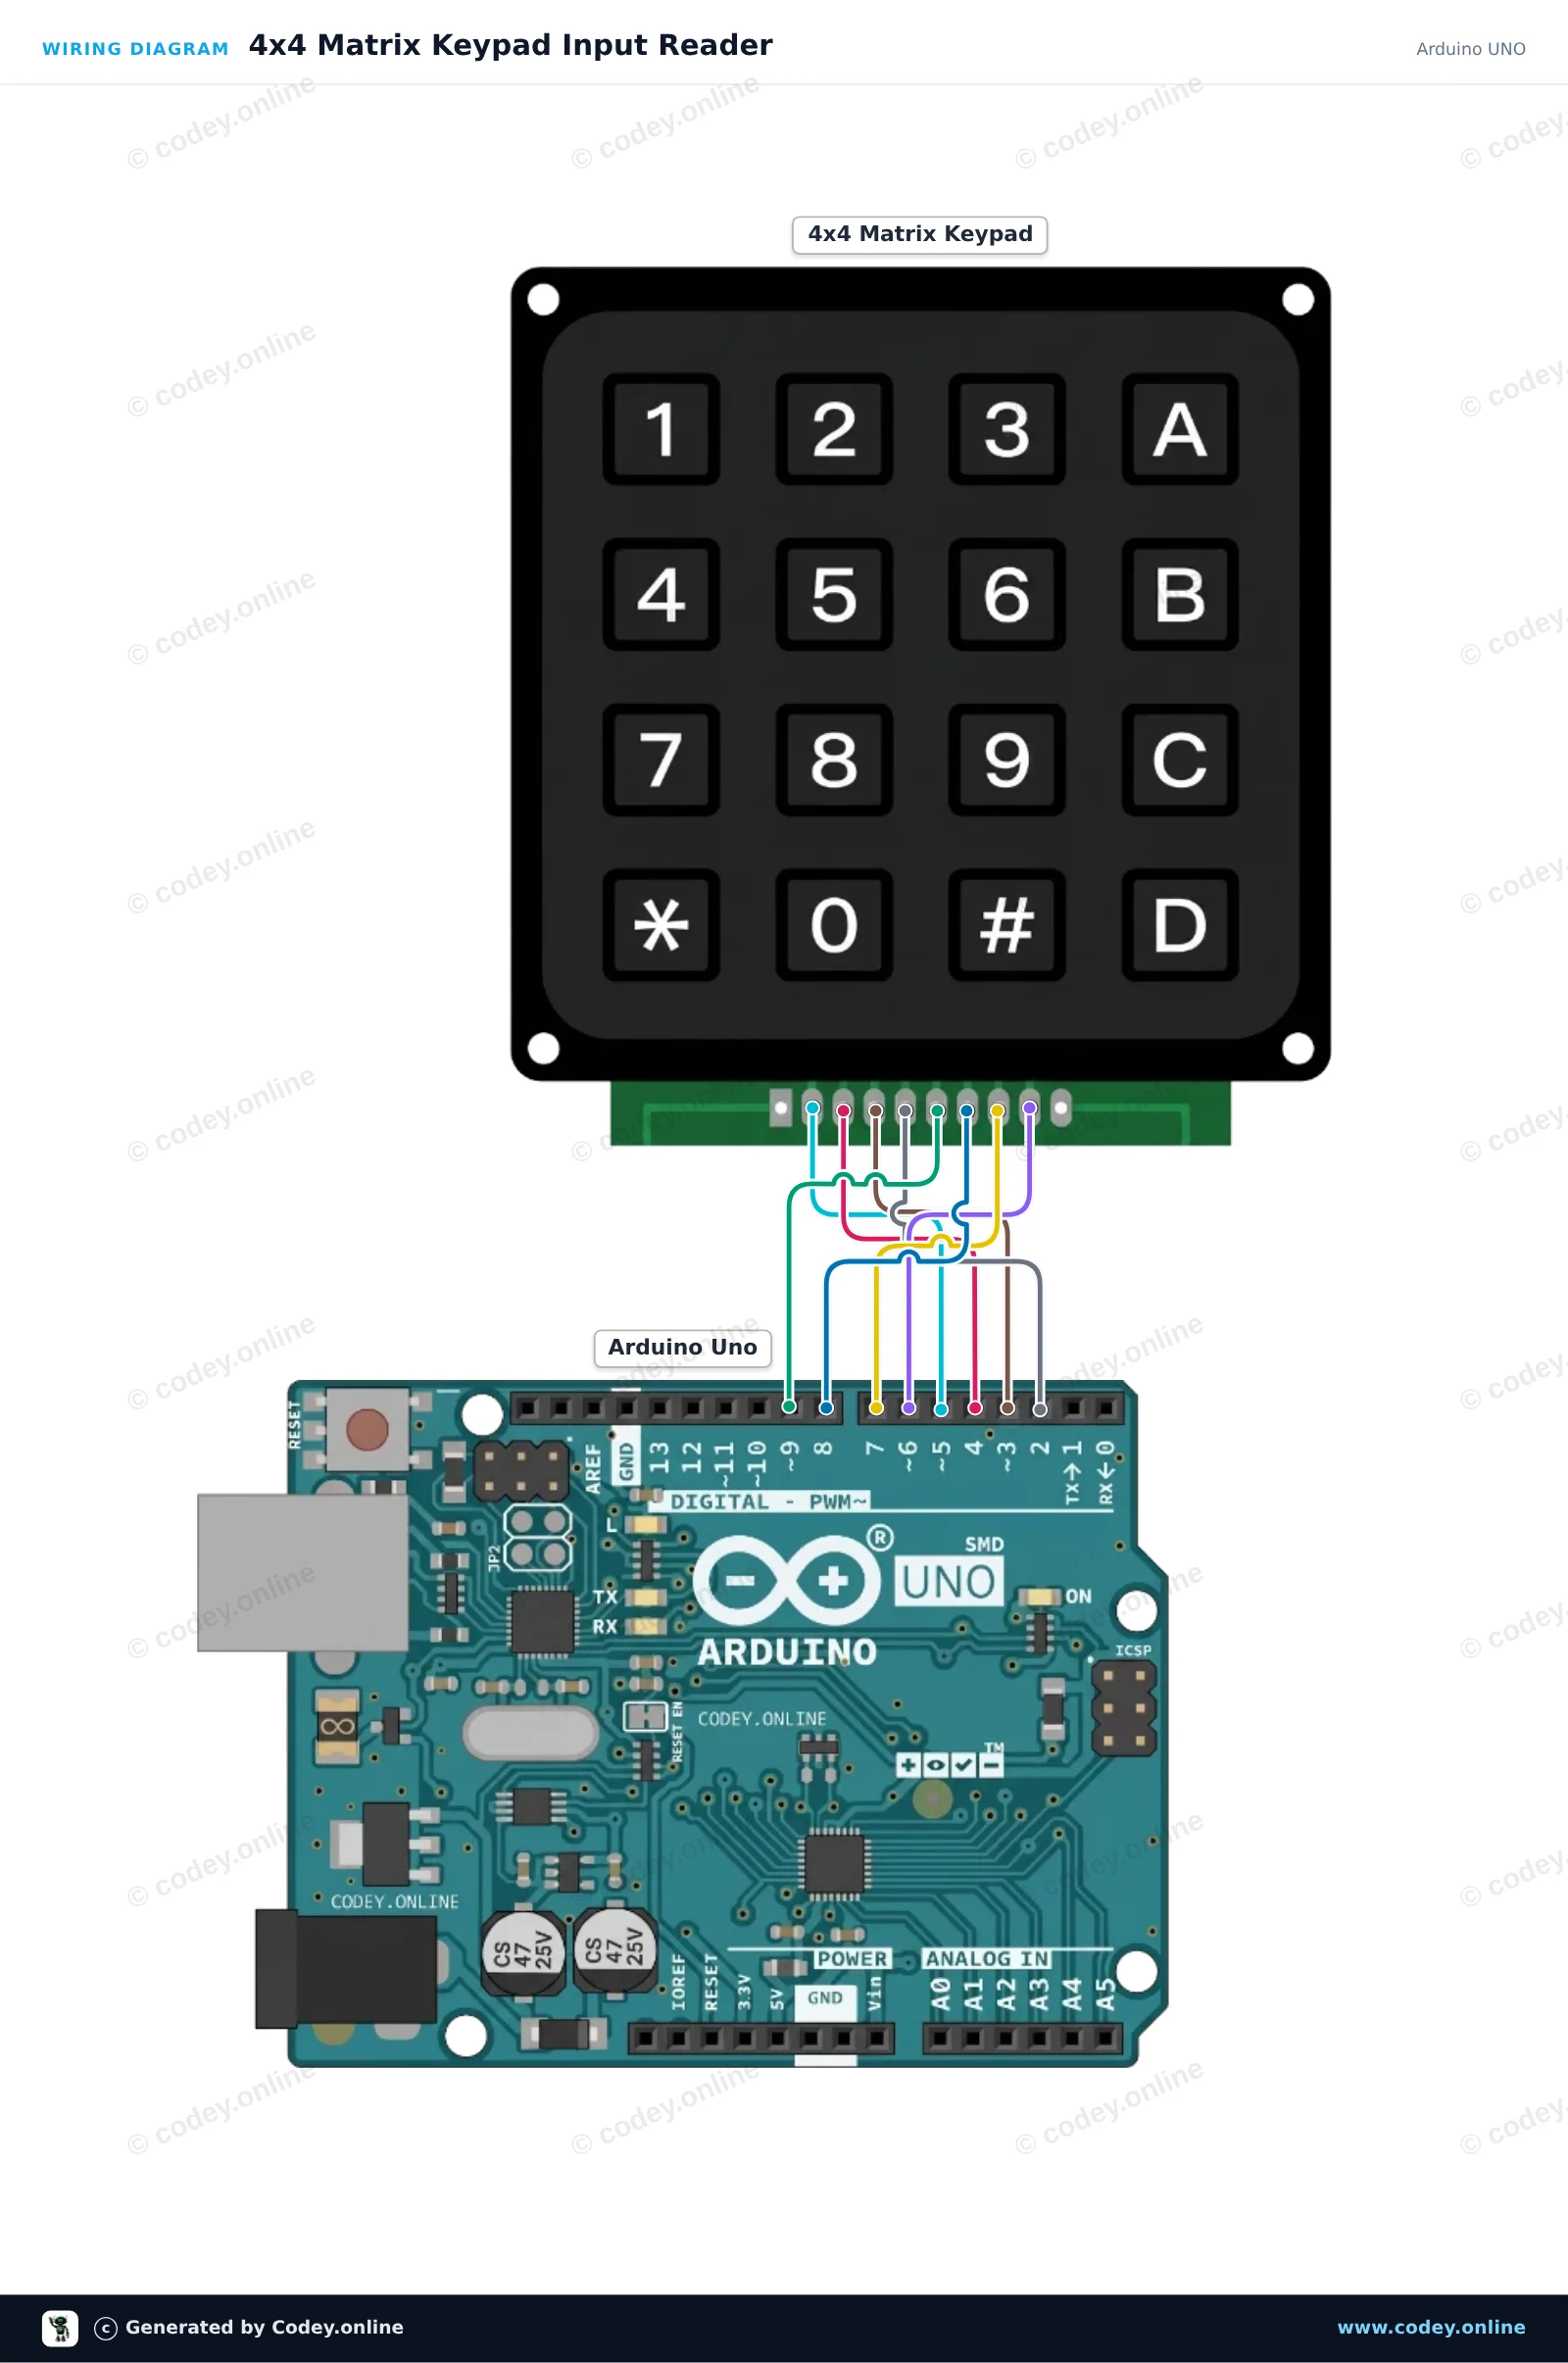
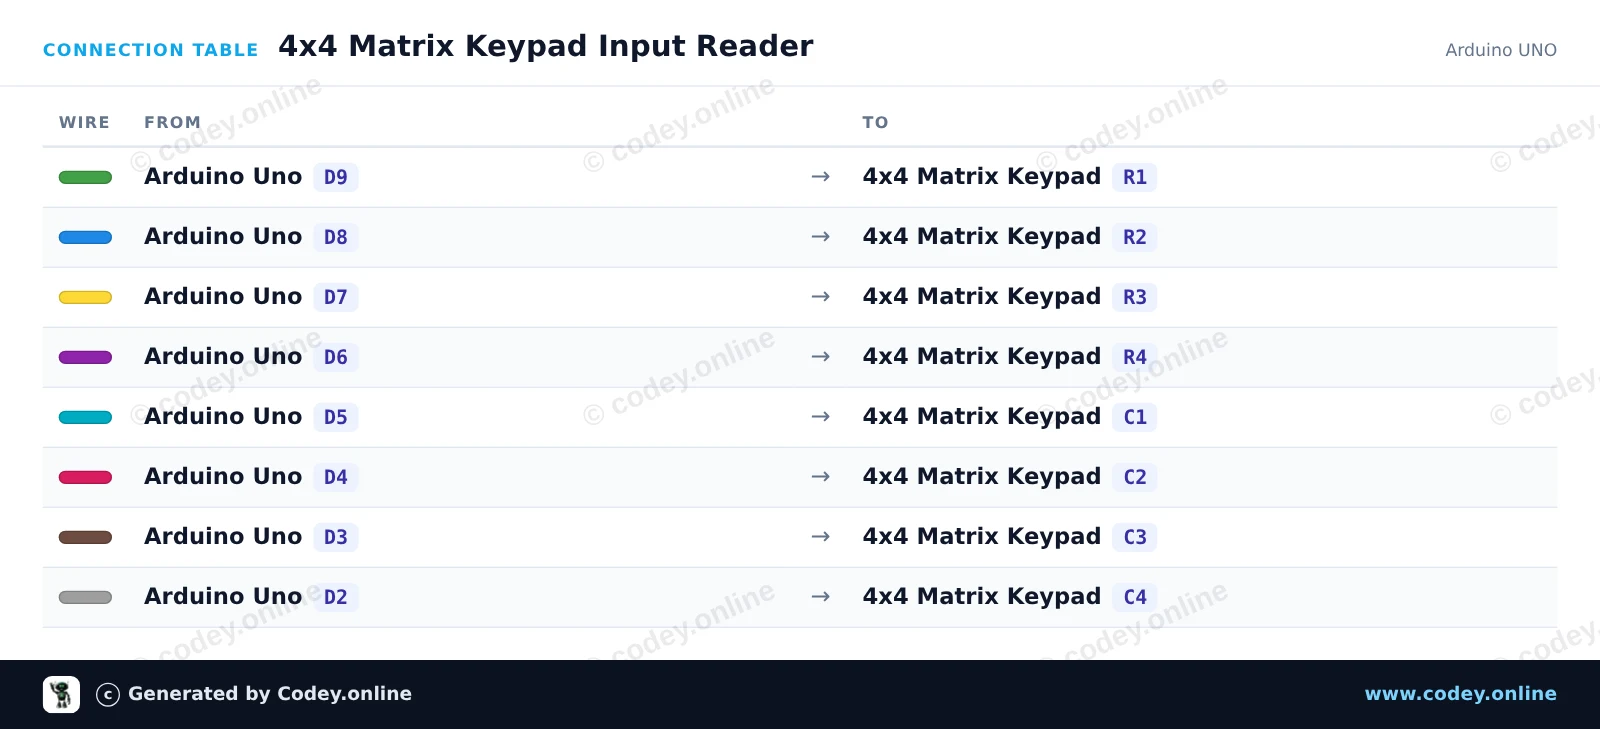
Sådan tilslutter du 4x4 matrix keypad sort til en Arduino UNO eller ESP32, med en eksempelsketch, du kan uploade med det samme.
Dette projekt viser, hvordan man læser input fra et 4x4 matrix-tastatur med en Arduino Uno. Når der trykkes på en knap på tastaturet, udskrives det tilsvarende tegn direkte i Serial Monitor ved 115200 baud.
/*
 * ==================================================================
 *  Generated by Codey.online  —  https://www.codey.online
 * ==================================================================
 *  Project   : 4x4 Matrix Keypad Input Reader
 *  Board     : Arduino UNO (arduino:avr:uno)
 *  Parts     : Keypad 4x4
 *  Libraries : Keypad 3.1.1
 *
 *  Codey Online is an AI-powered browser IDE for Arduino and ESP32.
 *  Describe your project and Codey writes the code, draws the wiring
 *  diagram and uploads it to your board, straight from the browser.
 *  This code is free to use, modify and share, without warranty.
 * ==================================================================
 */

#include <Keypad.h>

const byte ROWS = 4;
const byte COLS = 4;

char keys[ROWS][COLS] = {
  {'1', '2', '3', 'A'},
  {'4', '5', '6', 'B'},
  {'7', '8', '9', 'C'},
  {'*', '0', '#', 'D'}
};

byte rowPins[ROWS] = {9, 8, 7, 6};
byte colPins[COLS] = {5, 4, 3, 2};

Keypad keypad = Keypad(makeKeymap(keys), rowPins, colPins, ROWS, COLS);

void setup() {
  Serial.begin(115200);
  Serial.println(F("4x4 Keypad Demo"));
  Serial.println(F("Press any key on the keypad..."));
}

void loop() {
  char key = keypad.getKey();

  if (key) {
    Serial.print(F("Key Pressed: "));
    Serial.println(key);
  }
}Nødvendige biblioteker: Keypad 3.1.1
Wiring diagram and example code generated by Codey.online — https://www.codey.online
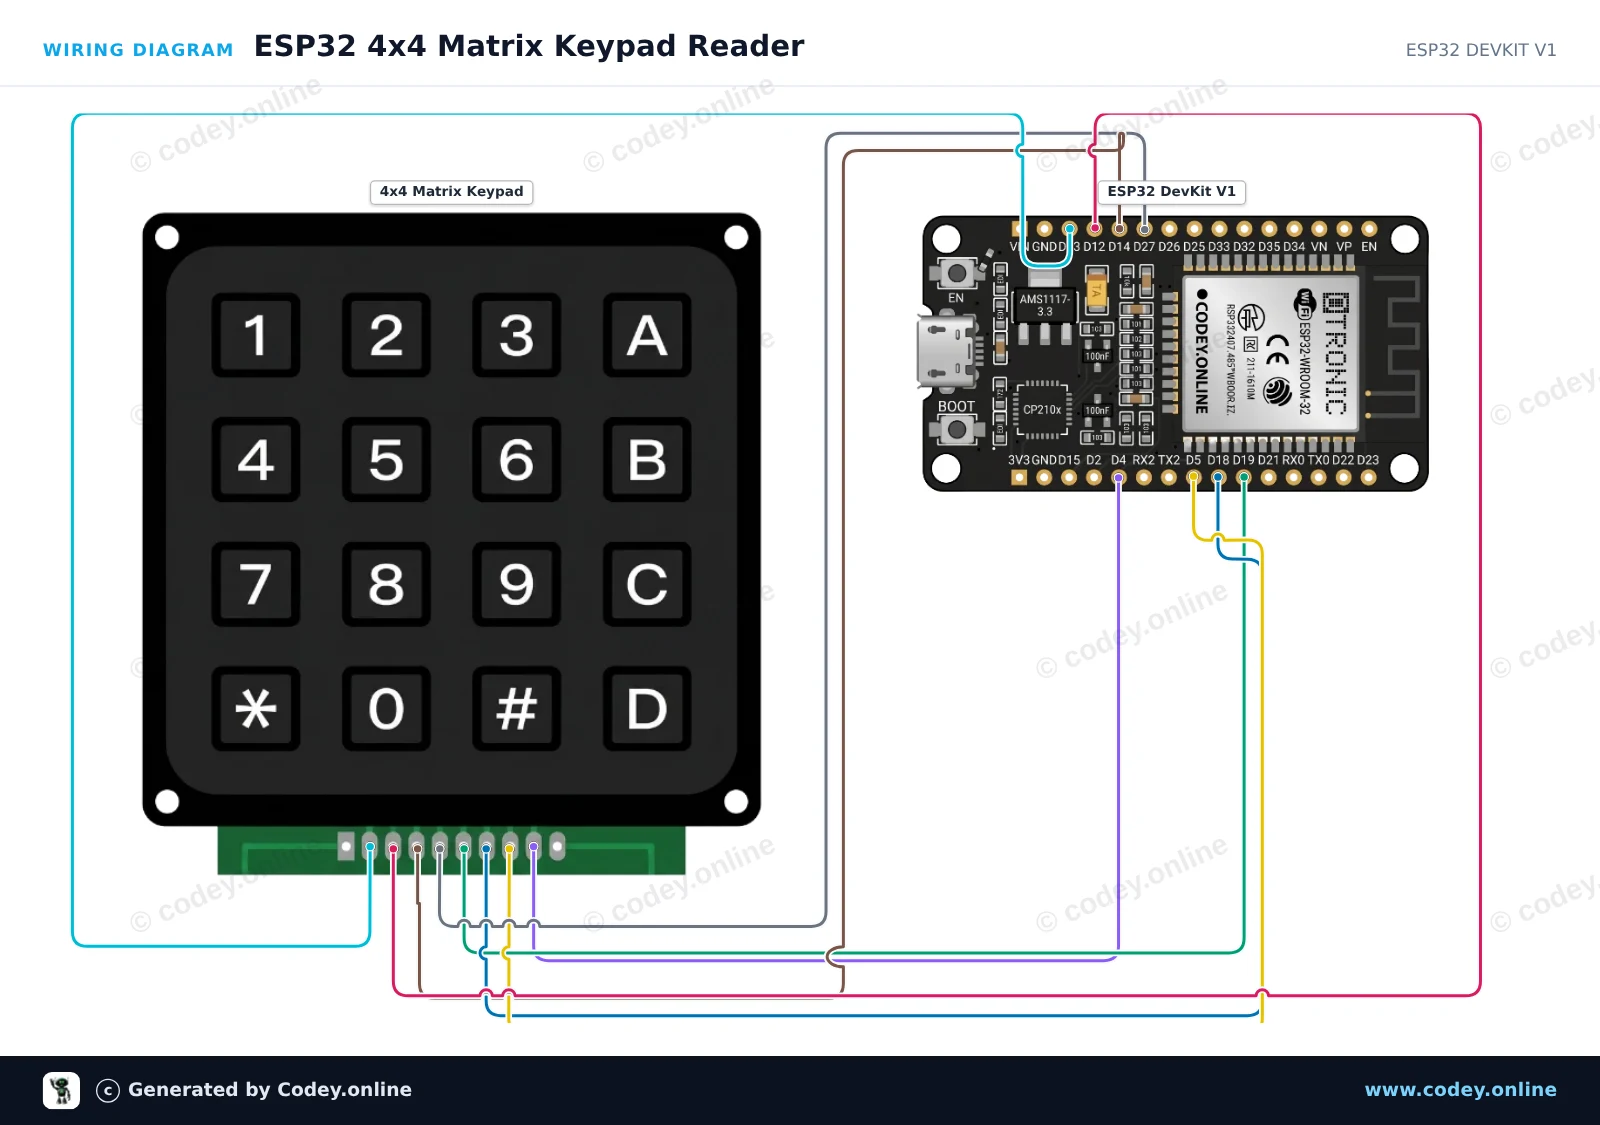
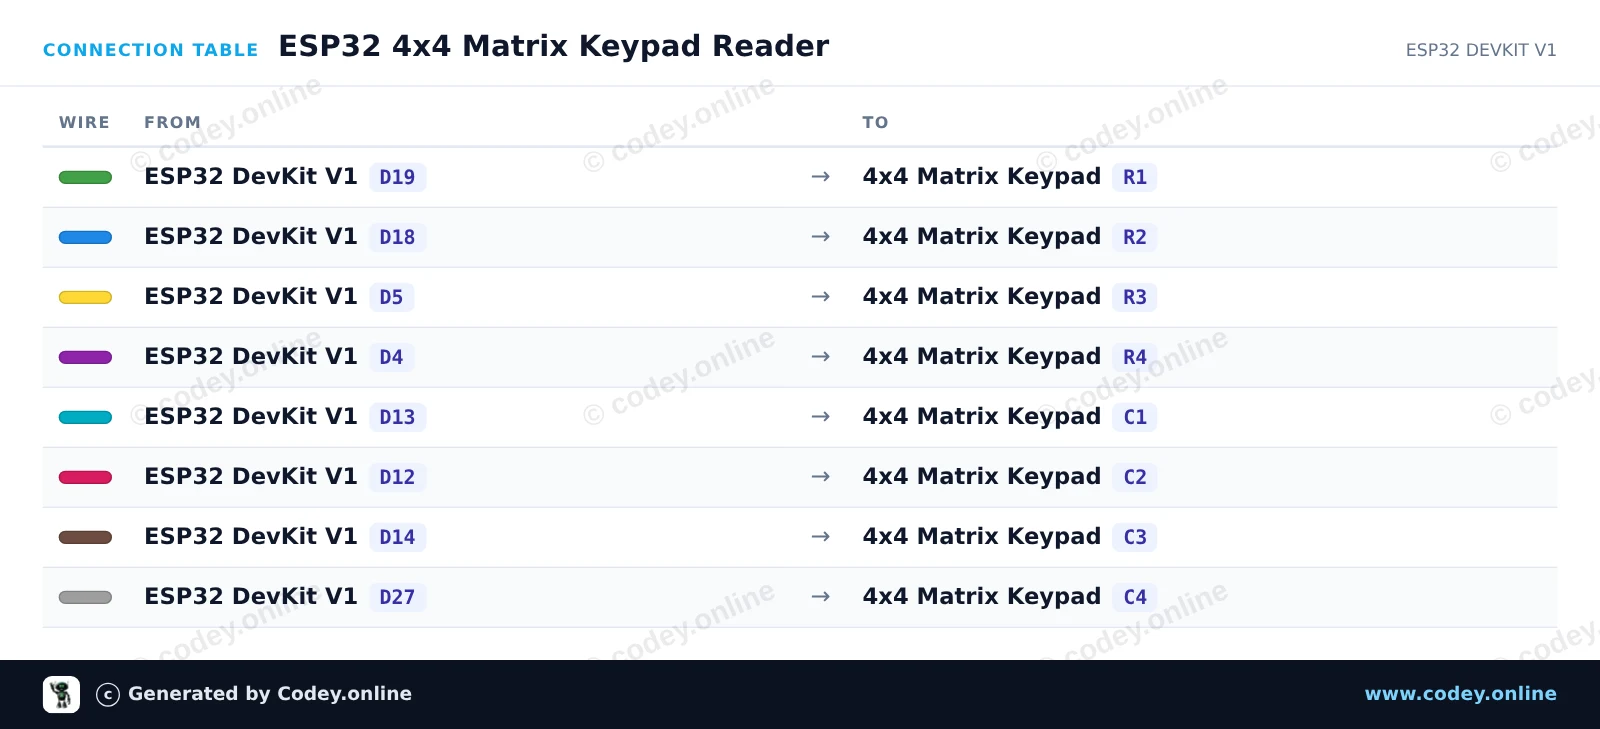
Dette kredsløb forbinder et 4x4 matrix-tastatur direkte til ESP32's GPIO'er. Keypad library scanner matrixens rækker og kolonner ved hjælp af interne pull-up modstande. Når du trykker på en vilkårlig tast, vises dens tegn i realtid i Serial Monitor.
/*
 * ==================================================================
 *  Generated by Codey.online  —  https://www.codey.online
 * ==================================================================
 *  Project   : ESP32 4x4 Matrix Keypad Reader
 *  Board     : ESP32 DEVKIT V1 (esp32:esp32:esp32doit-devkit-v1)
 *  Parts     : Keypad 4x4
 *  Libraries : Keypad 3.1.1
 *
 *  Codey Online is an AI-powered browser IDE for Arduino and ESP32.
 *  Describe your project and Codey writes the code, draws the wiring
 *  diagram and uploads it to your board, straight from the browser.
 *  This code is free to use, modify and share, without warranty.
 * ==================================================================
 */

#include <Keypad.h>

const byte ROWS = 4;
const byte COLS = 4;

char keys[ROWS][COLS] = {
  {'1', '2', '3', 'A'},
  {'4', '5', '6', 'B'},
  {'7', '8', '9', 'C'},
  {'*', '0', '#', 'D'}
};

byte rowPins[ROWS] = {19, 18, 5, 4};
byte colPins[COLS] = {13, 12, 14, 27};

Keypad keypad = Keypad(makeKeymap(keys), rowPins, colPins, ROWS, COLS);

void setup() {
  Serial.begin(115200);
  Serial.println("4x4 Keypad Test Ready. Press any key...");
}

void loop() {
  char customKey = keypad.getKey();

  if (customKey) {
    Serial.print("Key pressed: ");
    Serial.println(customKey);
  }
}Nødvendige biblioteker: Keypad 3.1.1
Wiring diagram and example code generated by Codey.online — https://www.codey.online






 English
  Nederlands
  Frans
Frans  Deutsch
  Italiano
  Español
  Suomi
Suomi  Polski
  Ελληνικά
  Български
  Čeština
  Hrvatski
  Aileen